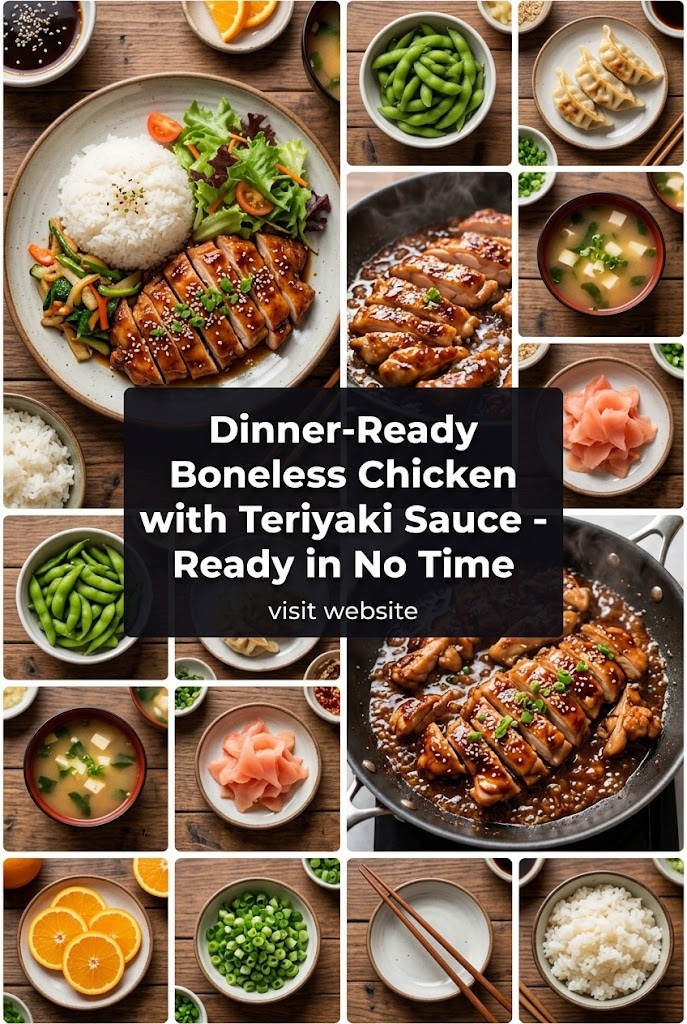
Dinner-Ready Boneless Chicken with Teriyaki Sauce – Ready in No Time
The evening rush is a universal experience. You walk through the door after a long day of work, the kids are asking about dinner, and the temptation to pull up a delivery app is stronger than ever. But what if you could create a dish that rivals your favorite Japanese restaurant in less time than it takes for a courier to arrive? Enter the Dinner-Ready Boneless Chicken with Teriyaki Sauce.
This isn’t just a recipe; it’s a culinary lifeline. It’s the perfect marriage of succulent protein and a glaze that hits every flavor note: sweet, salty, tangy, and deeply umami. In this comprehensive guide, we will explore why this dish is the ultimate weekday savior, the science behind the perfect glaze, and how you can master the art of the 20-minute gourmet meal.
Why Teriyaki Chicken is the Ultimate Weeknight Hero
In the world of home cooking, “easy” often comes at the cost of “flavorful.” Teriyaki chicken is the rare exception. It relies on a few high-impact ingredients that transform humble boneless chicken into a glistening masterpiece.
The beauty of this dish lies in its versatility. Whether you are a fitness enthusiast looking for a high-protein meal, a busy parent trying to sneak vegetables into a kid-friendly sauce, or a meal prepper looking for something that tastes just as good on Thursday as it did on Monday, this recipe delivers.
The Power of the “Umami” Punch
Teriyaki is more than just a sweet sauce. It is built on the foundation of fermented soy, which provides “umami”—the fifth taste that signals satisfaction to our brains. When you combine that depth with the brightness of ginger and the bite of garlic, you create a profile that is globally beloved.
Choosing Your Protein: Breast vs. Thighs
When it comes to boneless chicken, you generally have two paths. Both work beautifully with Teriyaki sauce, but they offer different experiences.
The Case for Boneless, Skinless Chicken Thighs
If you ask any professional chef, they will likely point you toward the thigh.
- Flavor: Thighs have a higher fat content, which means more flavor and a richer mouthfeel.
- Forgiveness: They are incredibly difficult to overcook. Even if you leave them in the pan a minute too long, they remain juicy.
- Texture: They stand up well to the high-heat searing required to get those crispy edges that hold onto the sauce.
The Case for Boneless, Skinless Chicken Breasts
For those watching their caloric intake or preferring a leaner bite, the breast is the way to go.
- Lean Protein: It’s almost pure protein, making it ideal for muscle recovery and weight management.
- Clean Canvas: The mild flavor of the breast allows the nuances of your homemade sauce to truly shine.
- Speed: Because they are leaner, they often cook faster, provided you slice them into uniform pieces to prevent drying out.
The Secret is in the Sauce: Homemade vs. Store-Bought
While there are dozens of bottled Teriyaki sauces on grocery store shelves, making your own is a game-changer. Most bottled versions are loaded with high-fructose corn syrup, artificial thickeners, and excessive sodium.
A traditional Teriyaki sauce requires only four core ingredients:
- Soy Sauce: The salty, fermented base.
- Mirin: A sweet Japanese rice wine that adds luster and a mild acidity.
- Sake: Adds depth and helps tenderize the meat (can be substituted with dry sherry or omitted).
- Sugar or Honey: For that signature sweetness and caramelization.
In our “Ready in No Time” version, we’ll add aromatics like fresh ginger and garlic to elevate the dish from “good” to “unforgettable.”
Essential Kitchen Tools for Success
You don’t need a professional kitchen to make world-class Teriyaki, but a few specific tools will make the process faster and the results more consistent:
- A Heavy-Bottomed Skillet: Cast iron or heavy stainless steel is best. It retains heat well, ensuring a beautiful sear on the chicken.
- A Sharp Chef’s Knife: Cutting the chicken into uniform, bite-sized pieces ensures everything cooks at the same rate.
- A Microplane: Perfect for grating fresh ginger and garlic into a fine paste that melts into the sauce.
- Whisk: To ensure your cornstarch slurry (the secret to a glossy sauce) is perfectly smooth.
The Master Recipe: 20-Minute Boneless Teriyaki Chicken
This recipe serves four and can be doubled easily for meal prep.
Ingredients
The Chicken:
- 1.5 lbs Boneless, skinless chicken thighs or breasts (cut into 1-inch cubes)
- 1 tablespoon Neutral oil (avocado, grapeseed, or vegetable oil)
- Salt and pepper to taste
- 1 tablespoon Cornstarch (to coat the chicken for extra crispiness)
The Quick Teriyaki Sauce:
- 1/2 cup Low-sodium soy sauce
- 1/4 cup Water
- 3 tablespoons Brown sugar (or honey for a floral note)
- 1 tablespoon Mirin
- 1 teaspoon Toasted sesame oil
- 2 cloves Garlic, minced
- 1 teaspoon Fresh ginger, grated
- 1 teaspoon Cornstarch dissolved in 1 tablespoon cold water (the slurry)
Garnish (Optional but Recommended):
- Toasted sesame seeds
- Thinly sliced green onions
- Red pepper flakes (for a kick)
Step-by-Step Instructions
1. Prep the Chicken
Pat the chicken pieces dry with a paper towel. This is the most important step for a good sear—moisture is the enemy of browning. Toss the chicken in a bowl with a pinch of salt, pepper, and a tablespoon of cornstarch. The cornstarch creates a thin barrier that helps the sauce cling to the meat later.
2. Sear for Success
Heat your oil in a large skillet over medium-high heat. Once the oil is shimmering, add the chicken in a single layer. Do not crowd the pan; if necessary, cook in two batches. Let the chicken sit undisturbed for 3-4 minutes to develop a golden-brown crust. Flip and cook for another 3 minutes until nearly cooked through. Remove the chicken from the pan and set aside.
3. Build the Sauce
In the same pan (don’t wash it! those brown bits are flavor gold), turn the heat down to medium. Add the garlic and ginger, sautéing for just 30 seconds until fragrant. Pour in the soy sauce, water, brown sugar, mirin, and sesame oil. Stir to dissolve the sugar.
4. The Glaze Transformation
Bring the sauce to a gentle simmer. Whisk in your cornstarch slurry. You will see the sauce transform from a thin liquid into a thick, glossy glaze within about 60 seconds.
5. The Grand Finale
Add the cooked chicken back into the skillet. Toss the pieces thoroughly so every inch is coated in the shimmering Teriyaki sauce. Let it simmer for another minute so the chicken finishes cooking and absorbs the flavors.
6. Serve
Plate the chicken immediately over a bed of fluffy rice or steamed vegetables. Sprinkle with sesame seeds and green onions.
Variations to Suit Every Lifestyle
One of the reasons Teriyaki chicken has become a global staple is its adaptability. Here is how you can tweak the recipe to fit your specific needs.
The “Health-Conscious” Version
- Swap the Sugar: Use maple syrup, stevia, or monk fruit sweetener for a lower-glycemic option.
- Coconut Aminos: If you are avoiding soy or gluten, coconut aminos are an excellent 1:1 replacement for soy sauce. It is naturally sweeter and lower in sodium.
- Air Fried: Instead of pan-frying, toss the coated chicken in an air fryer at 400°F for 12 minutes, then toss with the sauce in a bowl.
The “Spicy Kick” Version
- Add a tablespoon of Sriracha or Sambal Oelek to the sauce mixture.
- Infuse the oil with dried Thai chilies before adding the chicken.
- Garnish with fresh jalapeño slices.
The “Veggie-Packed” Stir Fry
Teriyaki sauce loves vegetables. To make this a one-pan meal, remove the chicken once seared, then toss in broccoli florets, sliced bell peppers, snap peas, and carrots. Sauté until tender-crisp, then proceed with the sauce and chicken steps.
Perfect Pairings: What to Serve with Teriyaki Chicken
While the chicken is the star of the show, the right side dishes turn it into a complete, balanced meal.
1. The Classic Staples
- Jasmine or Basmati Rice: The floral aroma of Jasmine rice complements the ginger in the sauce perfectly.
- Brown Rice or Quinoa: For a nuttier flavor and a boost of fiber.
- Cauliflower Rice: A fantastic low-carb alternative that soaks up the extra sauce beautifully.
2. Vegetable Accompaniments
- Steamed Broccoli: The “trees” of the broccoli are perfect for catching and holding onto the Teriyaki glaze.
- Garlic Bok Choy: Briefly sautéed with a little soy sauce and sesame oil.
- Smashed Cucumber Salad: A cold, vinegary cucumber salad provides a refreshing contrast to the warm, sweet chicken.
3. Tropical Twists
- Grilled Pineapple: The acidity of the pineapple cuts through the richness of the soy sauce.
- Mango Salsa: Adds a bright, fruity element that makes the dish feel like a summer vacation.
The Science of Searing: Why Texture Matters
Many home cooks wonder why their Teriyaki chicken sometimes turns out “rubbery” or “boiled” looking. This usually happens because of overcrowding and low heat.
When you put too much cold meat into a pan at once, the temperature of the pan drops significantly. Instead of the exterior of the meat searing (the Maillard reaction), the meat begins to release its juices, essentially poaching itself in its own liquid.
Pro Tip: Use a pan that is large enough to allow space between the chicken pieces. If you hear a loud sizzle, you’re doing it right. If you hear a bubbling, wet sound, your pan is too cold or too full.
Meal Prepping Like a Pro
If you are someone who likes to prepare meals on Sunday for the week ahead, Teriyaki chicken is your best friend.
Storage Tips
- Refrigeration: Store the cooked chicken in an airtight container for up to 4 days.
- Freezing: You can freeze the cooked chicken and sauce for up to 3 months. To reheat, let it thaw in the fridge overnight and warm it in a skillet with a splash of water to loosen the sauce.
Prep Ahead Strategy
You can marinate the raw chicken in a portion of the sauce (minus the cornstarch slurry) the night before. This infuses the meat with flavor deep into the fibers. When you’re ready to cook, simply sear the marinated meat and thicken the remaining sauce.
Common Mistakes to Avoid
Even with a recipe this simple, a few pitfalls can hinder your results:
- Burning the Garlic: Garlic burns very quickly at high heat, becoming bitter. Always add it toward the end of the searing process or once you’ve lowered the heat for the sauce.
- Using Regular Soy Sauce: If you don’t use low-sodium soy sauce, the final dish can end up being overwhelmingly salty once the sauce reduces. If you only have regular soy sauce, dilute it with a bit more water.
- Skipping the Cornstarch: Without the slurry, the sauce will be watery and won’t “hug” the chicken. The glossiness is what makes the dish visually appealing.
- Overcooking the Breast: Chicken breast becomes dry and chalky very quickly. Use a meat thermometer to ensure you hit 165°F (74°C) and no higher.
The History and Evolution of Teriyaki
While we often associate Teriyaki with Japan, the version we know and love in the United States—thick, sweet, and heavy on the garlic—has deep roots in the Japanese-American community, particularly in Hawaii and Seattle.
The word Teriyaki is a combination of two Japanese words: Teri, meaning luster or gleam (referring to the sugar in the glaze), and Yaki, meaning grilled or broiled. Traditionally, in Japan, Teriyaki was a cooking method used primarily for fish. When Japanese immigrants moved to Hawaii, they adapted the recipe using local ingredients like pineapple juice and brown sugar to create a marinade for beef and chicken.
By the 1960s and 70s, “Teriyaki Houses” began popping up across the Pacific Northwest, turning this simple glaze into a cultural phenomenon. Today, it stands as a testament to culinary fusion—taking traditional techniques and adapting them to the fast-paced, flavor-forward American palate.
Troubleshooting Your Sauce
Sometimes, things don’t go exactly as planned in the kitchen. Here’s how to fix common sauce issues:
- Too Thick: If the sauce becomes a paste, simply whisk in a tablespoon of water or chicken broth at a time until it reaches your desired consistency.
- Too Thin: Let it simmer for another minute. If it’s still thin, mix another half-teaspoon of cornstarch with a tiny bit of water and add it in.
- Too Salty: Add a squeeze of lime juice or a teaspoon of rice vinegar. The acid helps balance the salt. You can also add a bit more sugar.
- Too Sweet: Add a splash more soy sauce or a dash of red pepper flakes to balance the sugar with salt or heat.
Bringing it All Together: A Lifestyle Choice
Choosing to cook a meal like Dinner-Ready Boneless Chicken with Teriyaki Sauce is about more than just satisfying hunger. It’s about taking control of what you eat. When you make your own Teriyaki, you know exactly how much sugar is inside. You know the quality of the oil. You know the chicken is fresh.
Furthermore, it builds confidence. Once you master the “Sear, Deglaze, Thicken” method used here, you can apply it to hundreds of other dishes. Swap the Teriyaki ingredients for lemon, butter, and capers, and you have Chicken Piccata. Swap them for orange juice, soy, and chili, and you have Orange Chicken.
Interactive Cooking: Getting the Kids Involved
If you have children, this is an excellent “gateway” recipe to get them interested in cooking.
- The “Shake” Method: Let them toss the chicken with cornstarch in a sealed gallon-sized bag.
- The Sauce Whisk: Have them measure and whisk the sauce ingredients (away from the heat).
- The Garnish: Let them be the “artists” who sprinkle the sesame seeds and green onions at the end.
Children are statistically more likely to try new foods—including vegetables like broccoli—if they helped prepare the meal. The sweetness of the Teriyaki sauce also makes it a very “safe” flavor profile for picky eaters.
Final Thoughts: The Joy of the 20-Minute Meal
The modern world asks a lot of us. We are expected to be productive at work, present at home, and healthy in our lifestyle choices. Often, these goals feel like they are in conflict. However, recipes like this Boneless Chicken with Teriyaki Sauce bridge the gap.
It proves that you don’t need hours of prep or a basket full of exotic ingredients to create something spectacular. With a few staples from your pantry and a package of boneless chicken, you can create a meal that brings everyone to the table, sparks conversation, and leaves everyone feeling satisfied.
Next time you’re staring at the fridge at 6:00 PM, don’t reach for the phone. Reach for the soy sauce. In twenty minutes, you’ll be sitting down to a hot, delicious, restaurant-quality dinner that you made all by yourself.
Quick Recap Checklist for Your Next Grocery Run:
- Boneless, skinless chicken thighs or breasts
- Low-sodium soy sauce
- Fresh ginger root (pro tip: store it in the freezer to make grating easier!)
- Fresh garlic
- Mirin (found in the Asian aisle)
- Cornstarch
- Green onions and sesame seeds for that professional finish
Dinner is served. Enjoy the sizzle, the smell, and most importantly, the taste!
Frequently Asked Questions (FAQs)
Can I use frozen chicken?
Yes, but you must thaw it completely first. If you try to sear frozen or partially frozen chicken, it will release too much water, and you won’t get that golden-brown crust. For best results, thaw in the refrigerator overnight.
Is Teriyaki sauce gluten-free?
Standard soy sauce contains wheat. To make this recipe gluten-free, use Tamari or Coconut Aminos and ensure your cornstarch is certified gluten-free.
Can I make this in a Slow Cooker or Instant Pot?
While you can, you will lose the “sear” which provides a lot of the flavor. If using a slow cooker, add the chicken and sauce (without the slurry) and cook on low for 4 hours. Whisk in the slurry at the end and turn to high for 15 minutes to thicken. For the Instant Pot, use the “Sauté” function for the chicken, add the sauce, and pressure cook for 5 minutes, followed by a quick release and thickening with the slurry.
How do I store leftover ginger?
Fresh ginger lasts about 3 weeks in the fridge, but it lasts indefinitely in the freezer. You don’t even need to peel it before freezing! When you need it, just grate the frozen root directly into your sauce.
What is the best oil for searing?
You want an oil with a high smoke point. Avocado oil is the gold standard for health and heat. Grapeseed and canola oil are also good choices. Avoid extra virgin olive oil for this specific recipe, as its smoke point is too low for the high-heat searing required.
My sauce is too dark, why?
The darkness comes from the soy sauce brand and how long it reduced. If it looks too dark, you can lighten it up with a splash of rice vinegar or even a little bit of chicken broth. It won’t affect the taste negatively; it just changes the opacity.
Can I use honey instead of brown sugar?
Absolutely. Honey provides a beautiful floral sweetness and a very sticky texture. Just keep an eye on the heat, as honey can burn slightly faster than brown sugar.
What’s the best way to cook the rice?
For the fluffiest rice, always rinse it under cold water until the water runs clear. This removes excess starch and prevents the rice from becoming gummy. Use a ratio of 1.5 cups of water to 1 cup of jasmine rice. Bring to a boil, cover, reduce to the lowest heat for 15 minutes, then let it sit (covered) for 5 minutes before fluffing with a fork.
Detailed Ingredient Spotlight: Mirin
Many people see “Mirin” in a recipe and consider skipping it, but it truly is the “secret ingredient” in Japanese cooking. Mirin is a type of rice wine similar to sake, but with a lower alcohol content and a higher sugar content.
What makes it unique is that the sugar is formed naturally during the fermentation process. It provides a unique “gloss” to sauces that plain sugar cannot replicate. If you absolutely cannot find it, you can substitute it with 1 tablespoon of rice vinegar mixed with 1/2 teaspoon of granulated sugar, but having a bottle of Mirin in your pantry will open up a whole new world of Asian-inspired cooking.
The Art of the Garnish
We eat with our eyes first. A bowl of brown chicken and brown sauce can look unappealing, even if it tastes delicious. This is where the garnish comes in.
- Green Onions: Slice them on a sharp bias (diagonal). This creates long, elegant shapes that look much better than simple circles.
- Sesame Seeds: Use a mix of black and white sesame seeds for a striking visual contrast.
- The “Pop”: A few slices of bright red chili or a side of bright green steamed edamame can turn a simple bowl into a work of art.
By focusing on these small details, you transform a “quick weeknight dinner” into a dining experience that makes you feel proud of what you’ve put on the table.
Conclusion: Master the Quick Teriyaki
You now have all the tools, techniques, and tips to create the perfect Dinner-Ready Boneless Chicken with Teriyaki Sauce. This dish is a reminder that good food doesn’t have to be complicated, and “fast food” can be something you make in your own kitchen with fresh, wholesome ingredients.
The next time the clock is ticking and hunger is rising, remember: you’re only 20 minutes away from a spectacular meal. Happy cooking!